
 Sign in







Create a custom role
4 steps, in the order you do them.

Follow it on screen.
- 1
Start a new role
Built-in roles stay; this adds one of your own.
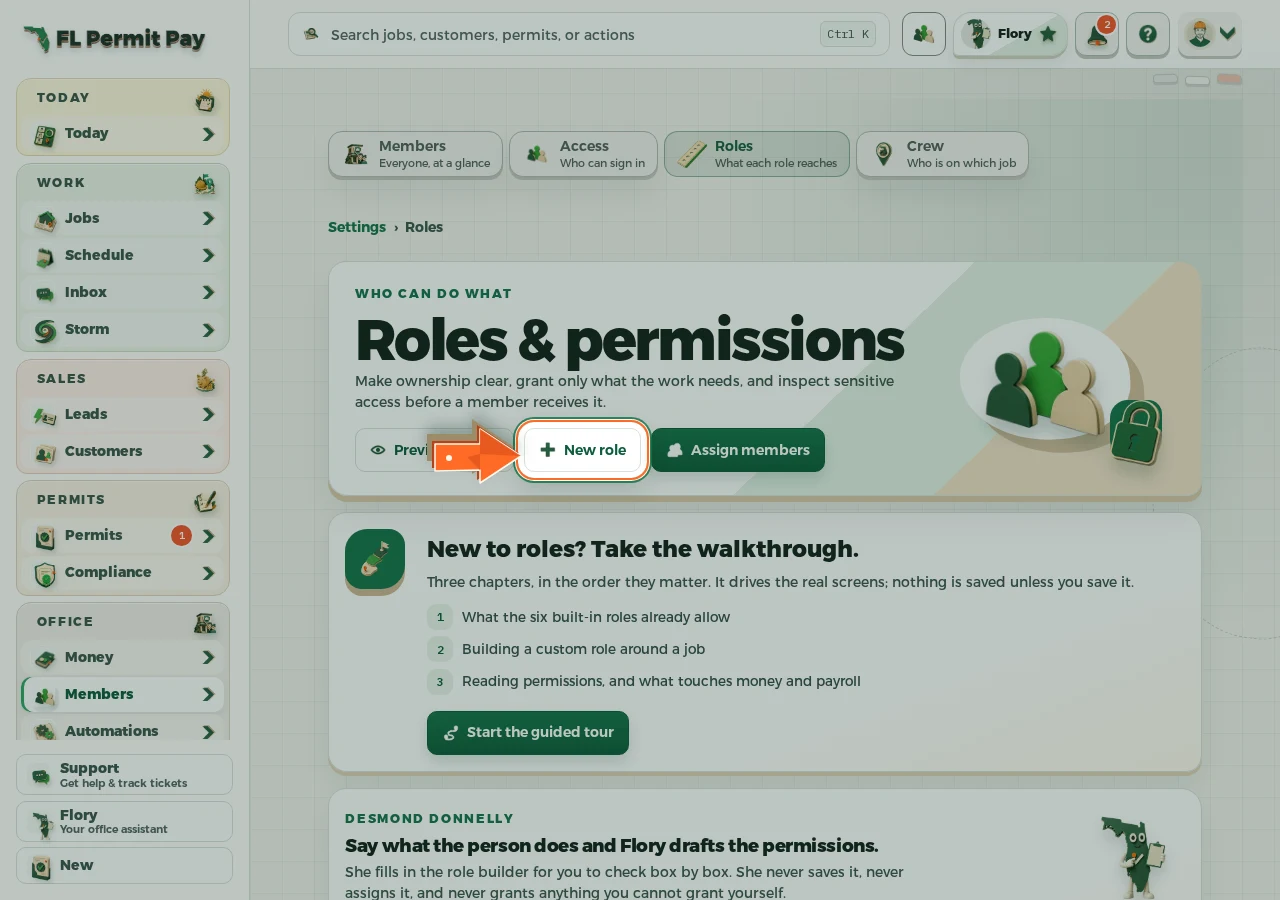
The real screen - the arrow marks the control. Tap to see it full size. - 2
Pick the responsibilities
Grouped by what somebody does, not by table names.
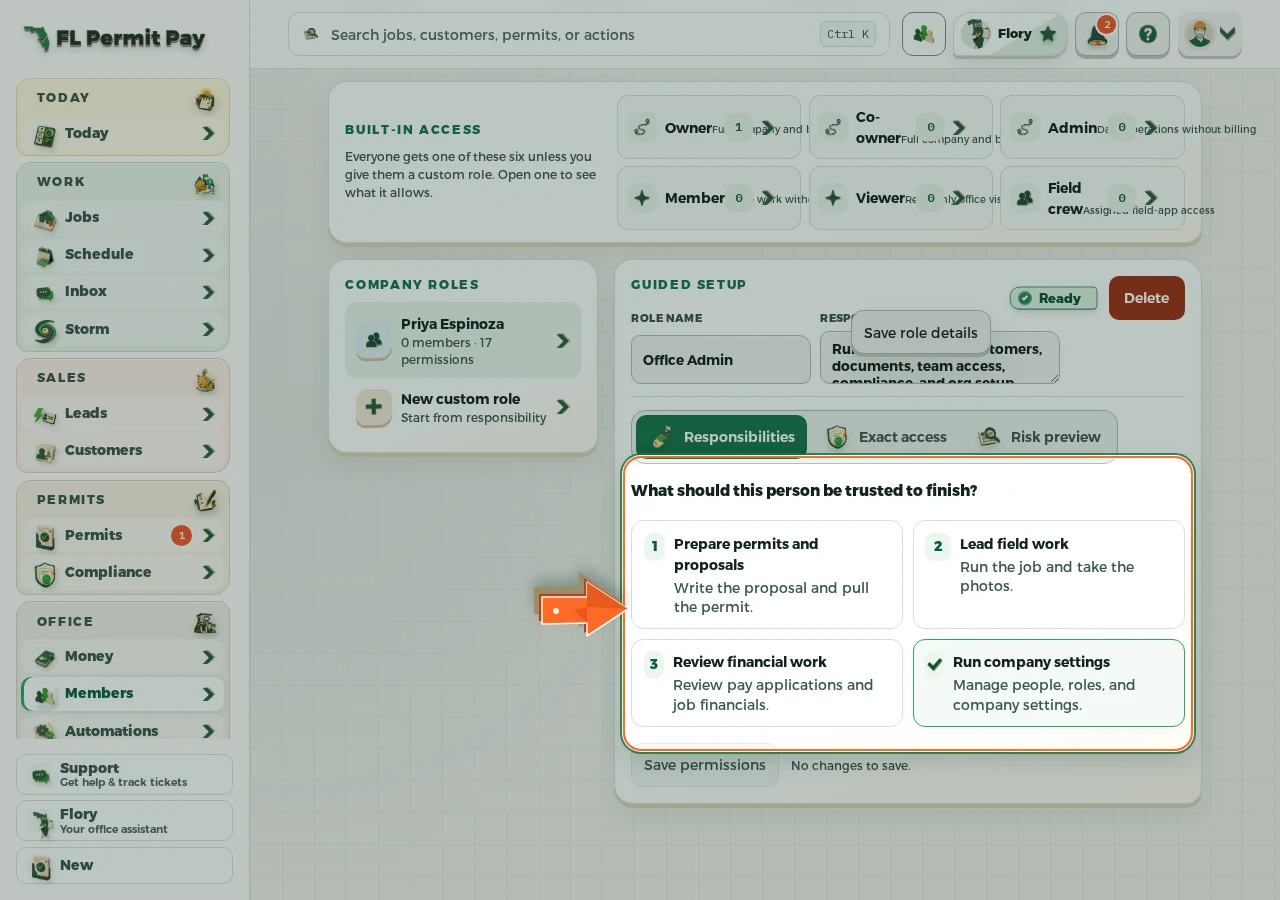
The real screen - the arrow marks the control. Tap to see it full size. - 3
Preview what they will see
Check it before anybody is assigned to it.
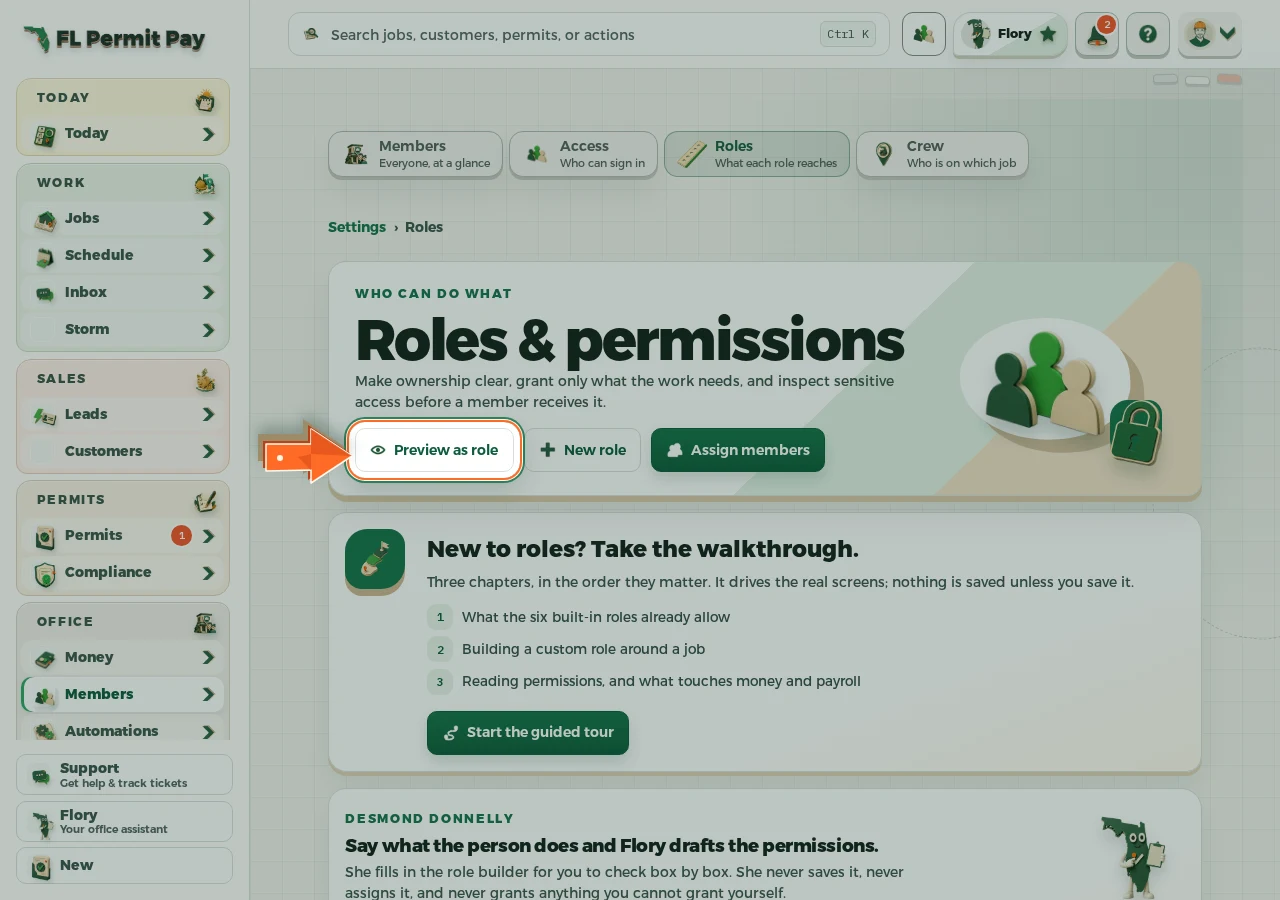
The real screen - the arrow marks the control. Tap to see it full size. - 4
Save the role
It becomes selectable on every invite and member row.
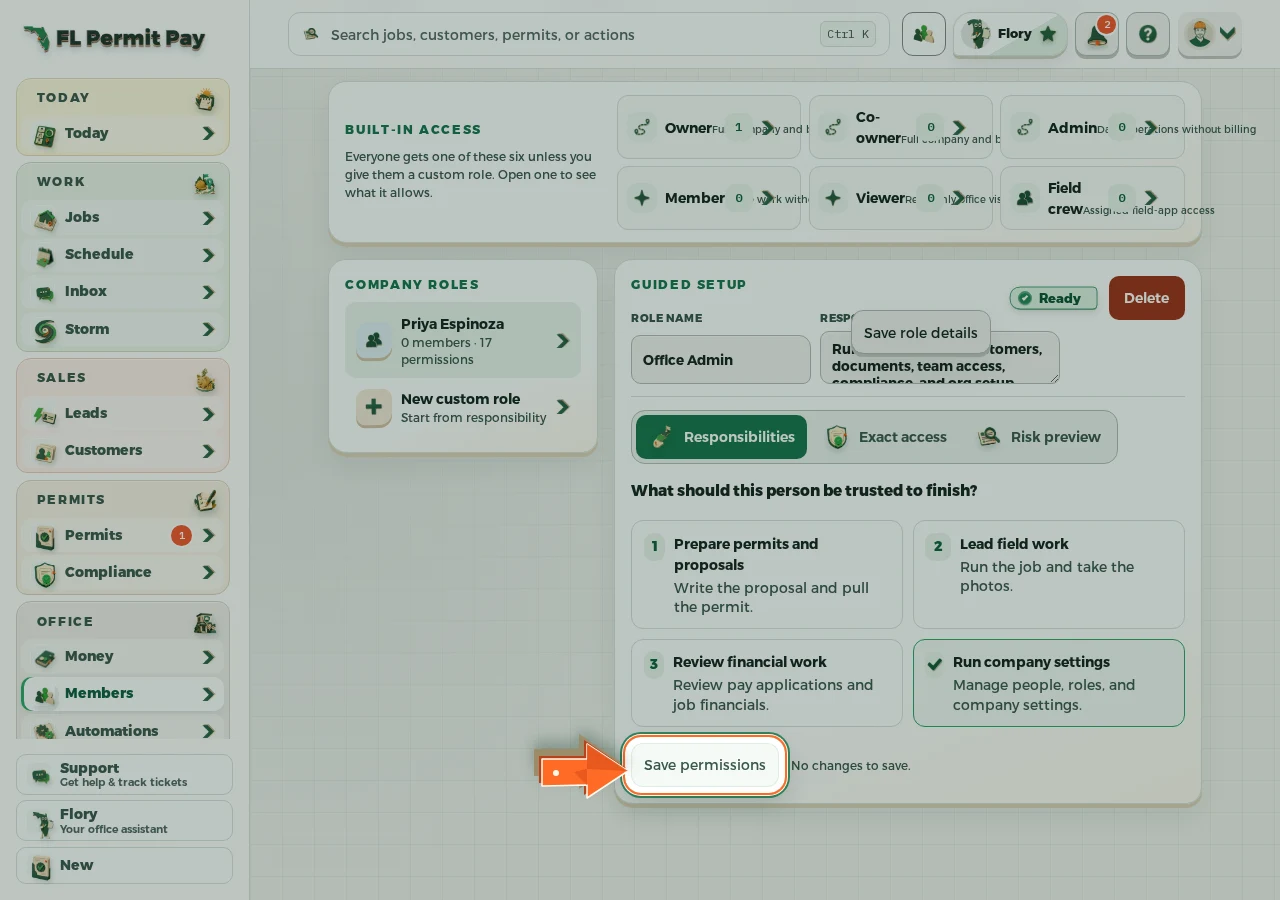
The real screen - the arrow marks the control. Tap to see it full size.
