
 Sign in






Create a job
6 steps, in the order you do them.

Follow it on screen.
- 1
Open New job
The job list's primary control starts a blank job.
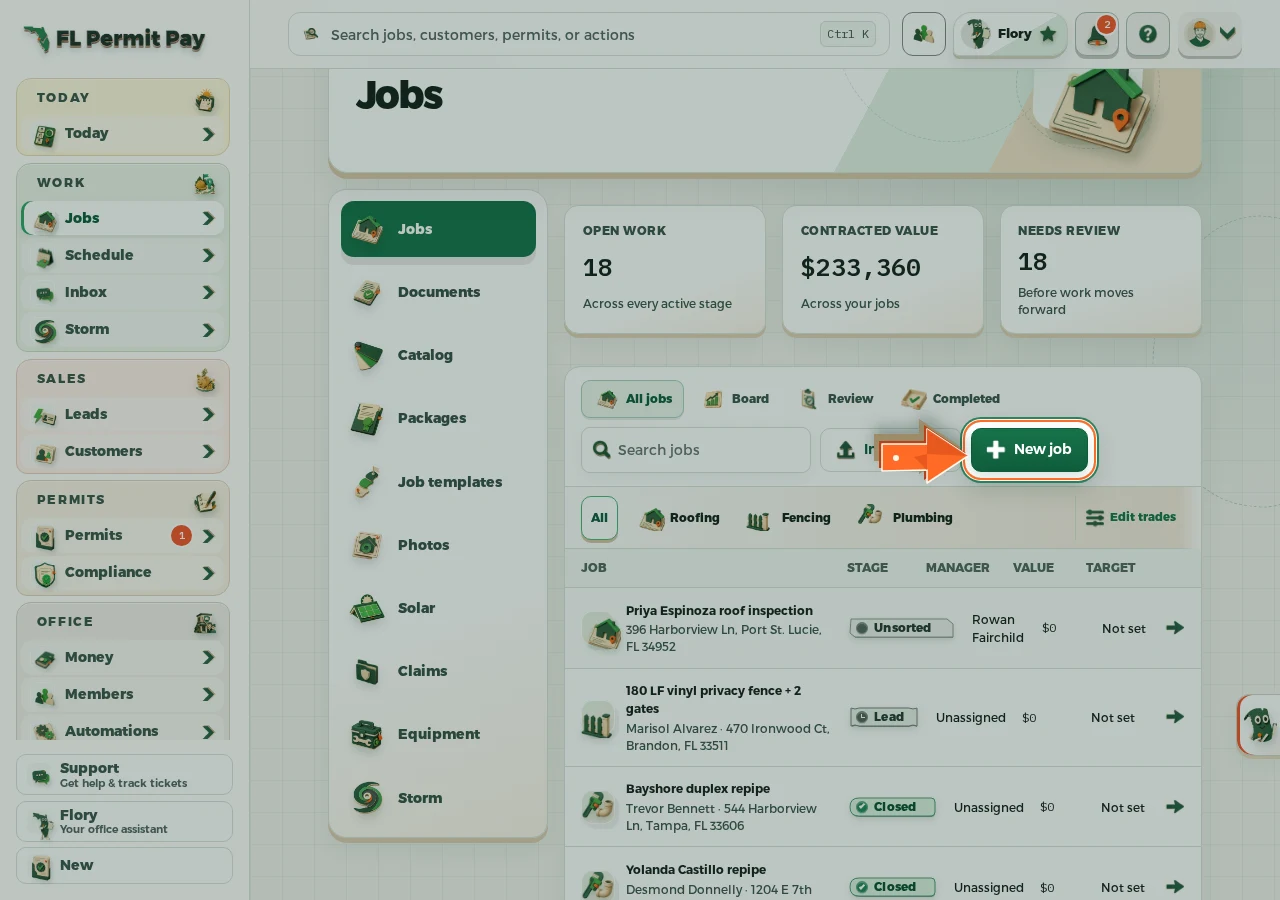
The real screen - the arrow marks the control. Tap to see it full size. - 2
Pick the trade
The trade decides which permit guidance the job gets.
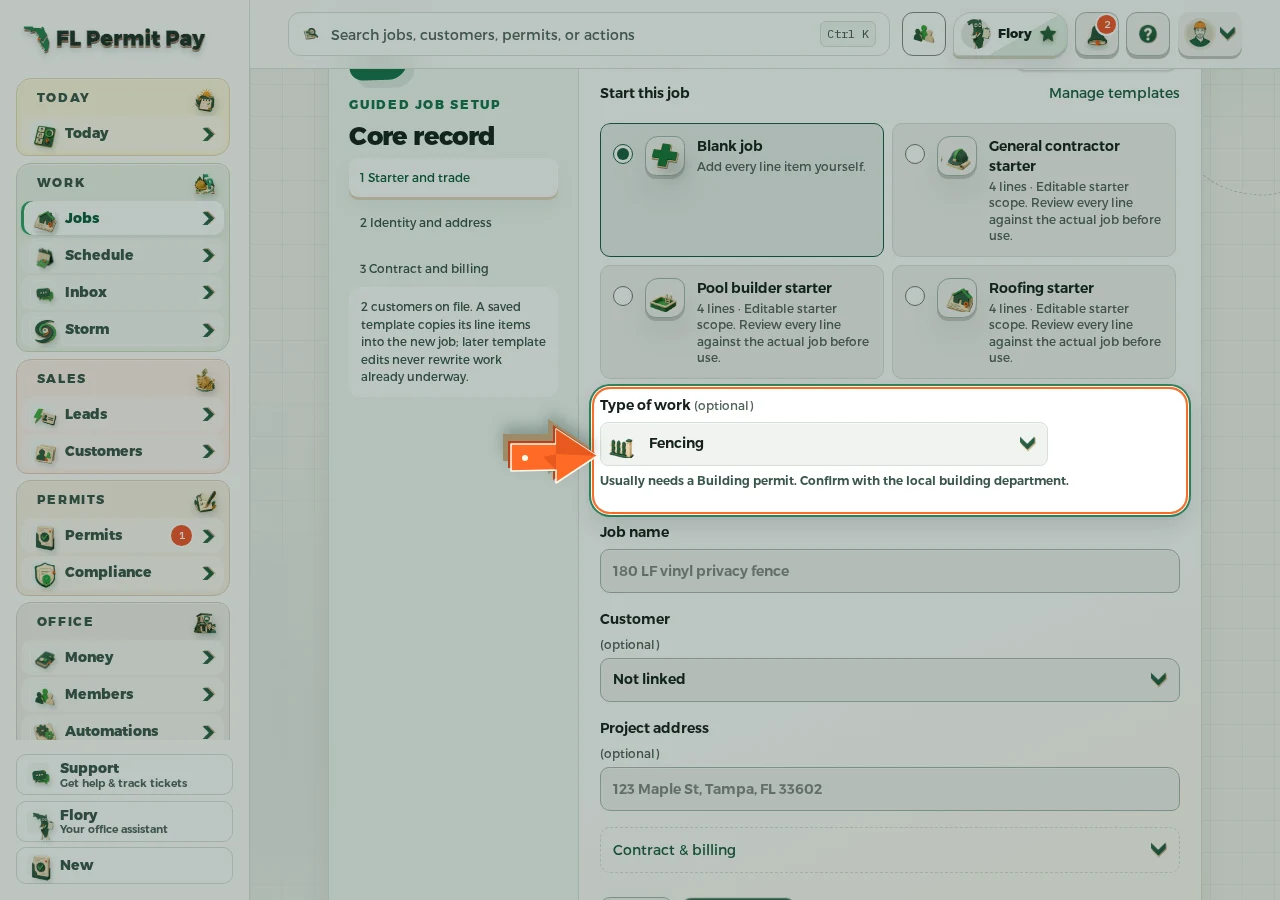
The real screen - the arrow marks the control. Tap to see it full size. - 3
Name the job
Whatever you would call it on the phone; the address goes below.
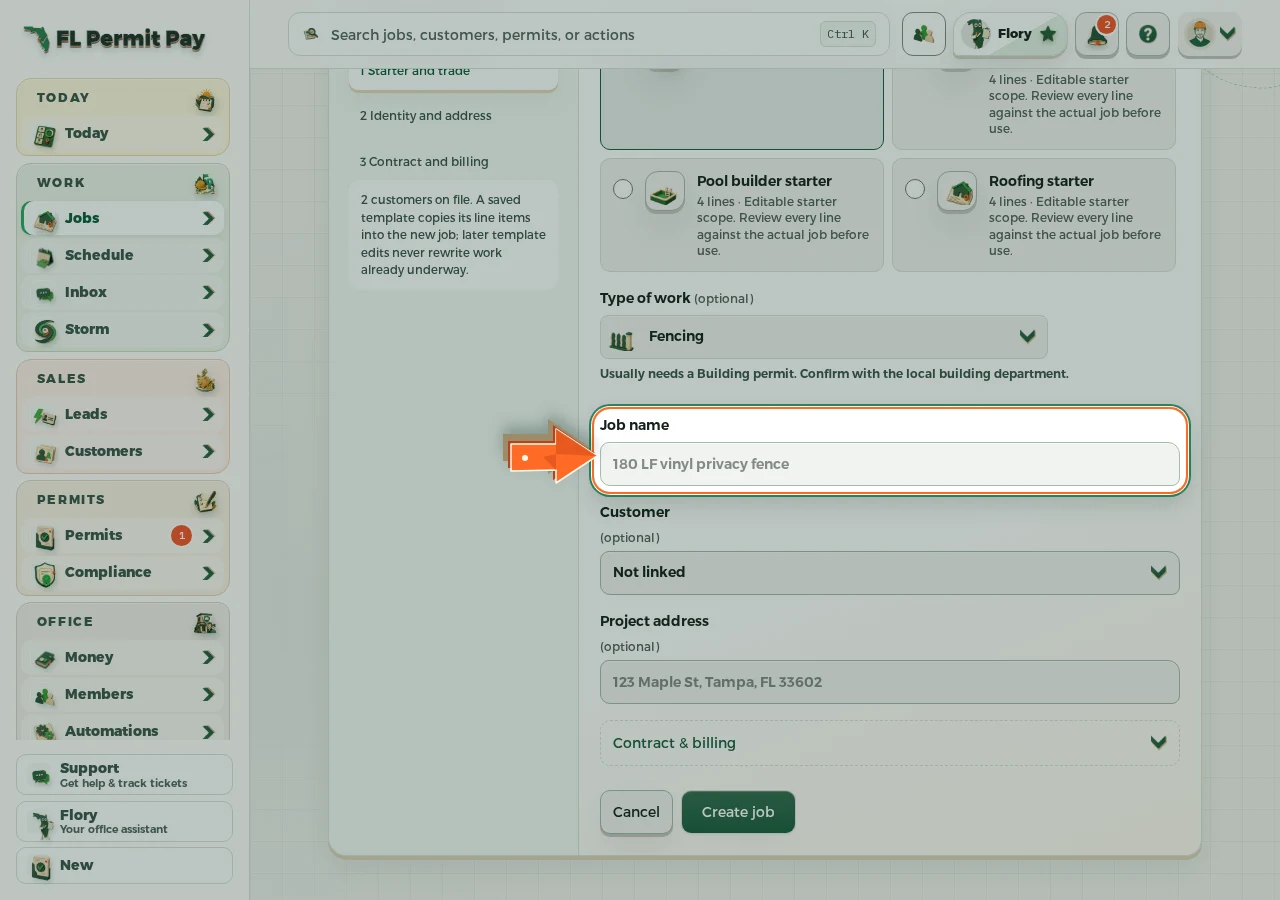
The real screen - the arrow marks the control. Tap to see it full size. - 4
Link the customer
Optional now, and linkable later from the job itself.
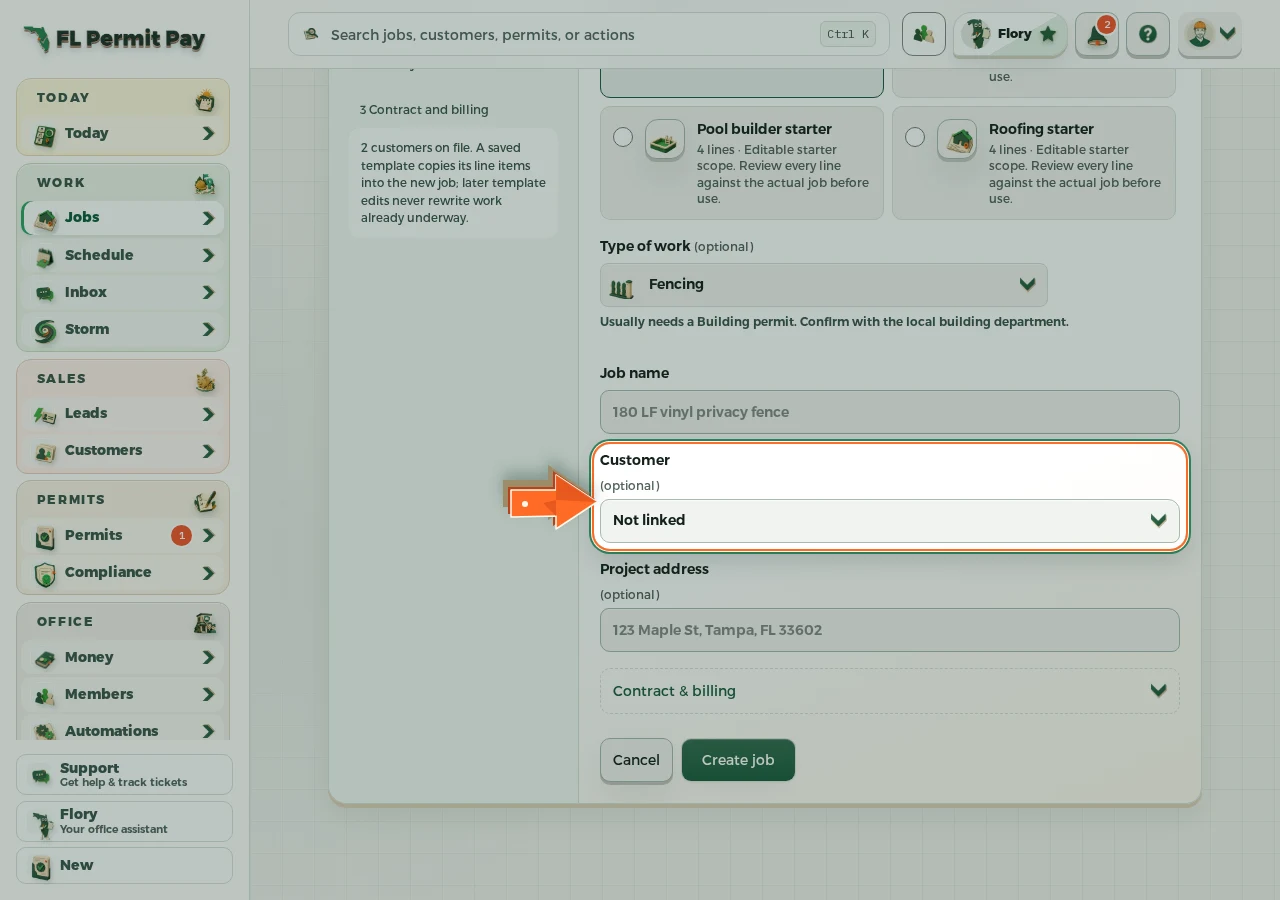
The real screen - the arrow marks the control. Tap to see it full size. - 5
Set the project address
This is what permits, measurements and storm checks key off.
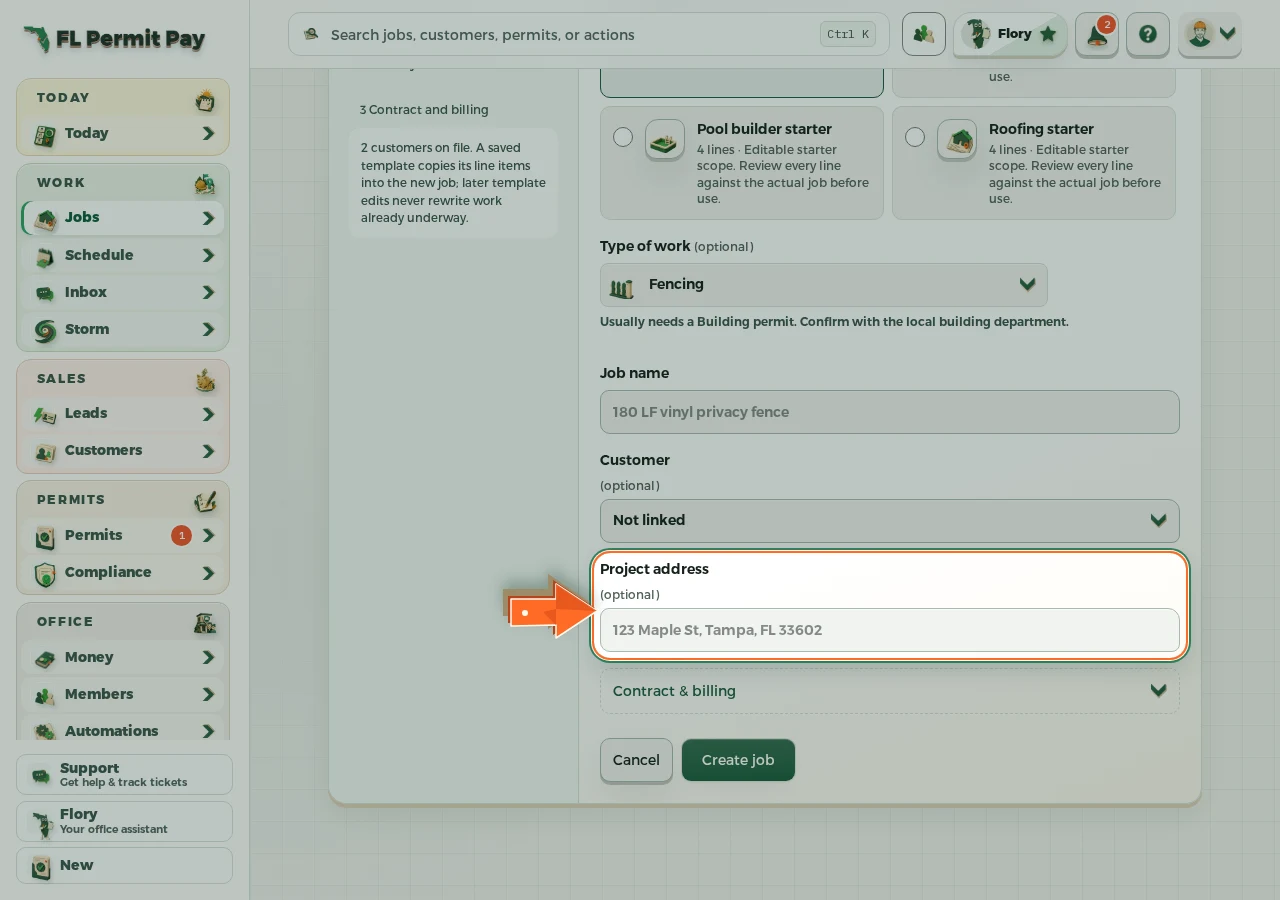
The real screen - the arrow marks the control. Tap to see it full size. - 6
Create the job
Everything after this - permits, schedule, photos, money - hangs off this record.
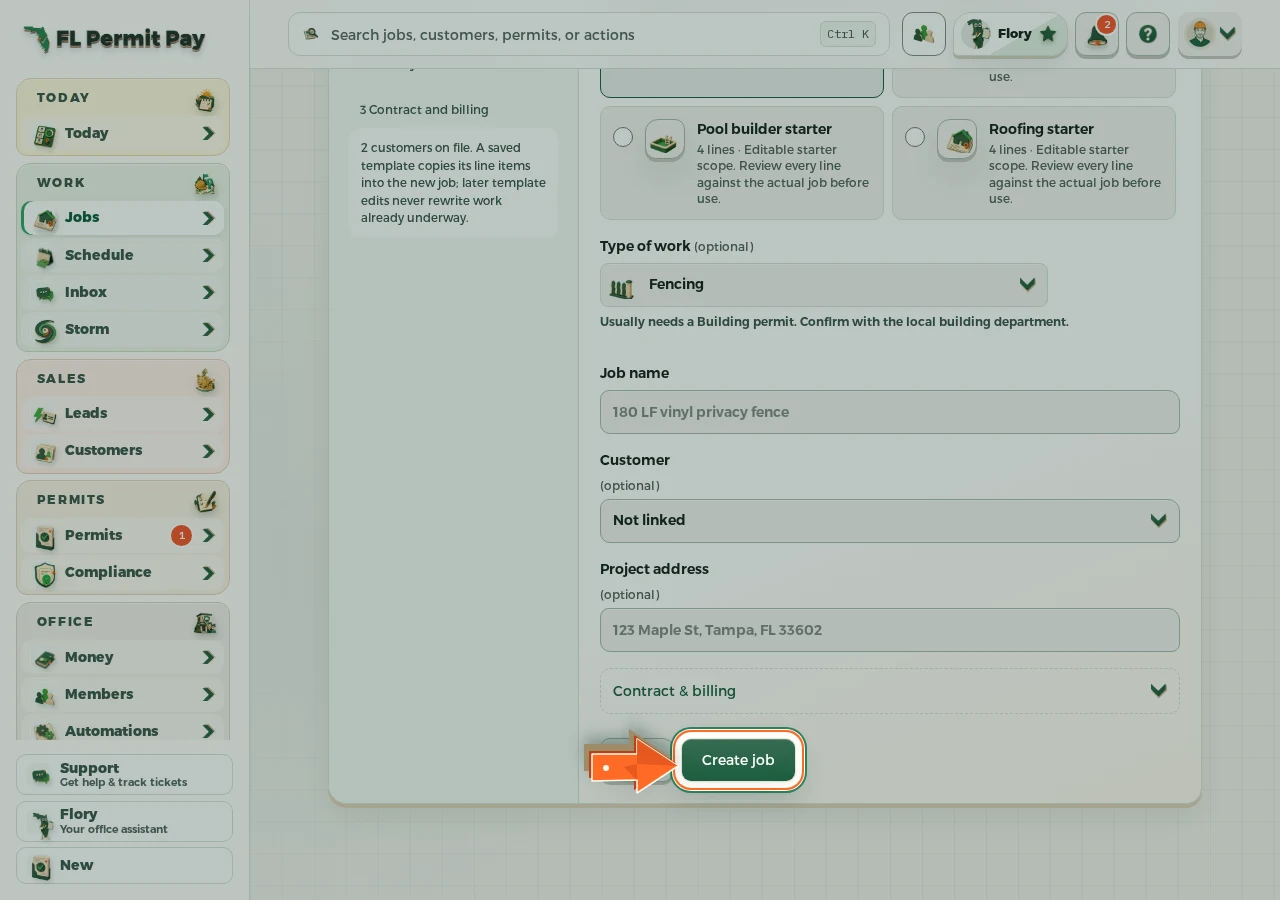
The real screen - the arrow marks the control. Tap to see it full size.
